

Why is varnishing your oil paintings so important? Let’s find out.
Now that you have acquired that beautiful oil painting, you will want to take measures to ensure that it stays that way. One important thing to do is make sure it has received several coats of artist-grade, non-yellowing varnish.
Applying varnish to their oil paintings is something every artist should do before allowing their artwork to leave the studio. Varnish is a final, transparent protective layer applied to a painting after it is finished and completely dry. It is an important first step in preserving the work of art so it lasts for generations to come.
Why varnish an oil painting?
Varnish saturates the colors, making them pop.
It brings out the vibrancy of the colors and gives them that just-painted look and shine. In addition, varnish helps to keep those beautiful colors from fading as the years go by.
Varnish creates an even sheen over the entire surface of the painting.
Oil paint colors dry very differently due to the different pigments that make up each color. When completely dry, some colors appear matte, some satin, and some glossy. A layer or two of varnish will even out the final appearance of the painting, giving it a consistent overall look.
Varnish protects the painted surface from atmospheric elements and makes the surface easier to clean.
All paintings will require cleaning as time goes by; however, the varnish will reduce the frequency of those cleanings and reduce the risk of any possible damage to the painting. Without a protective varnish, a painting will gradually accumulate dust, grime, dirt, grease, moisture, and environmental pollutants. Over time, these elements can dull the colors and lead to cracking and chipping, altering the painting’s appearance as years go by.
When should oil paintings be varnished?
An oil painting should be allowed to dry for a minimum of 6 months before applying varnish. Depending on how thick the paint is applied, it might even need as much as 12 months of drying time. It’s crucial that the oil painting is thoroughly dry before the varnish is applied; otherwise, the varnish may crack. The reason for this is that varnish dries before oil paint does. As oil paint dries, it moves slightly, and since the varnish is already dry, it begins to crack.
If your painting has never been varnished, you will need to wait at least a year and then take it to a reputable frame shop. They may be able to varnish the painting for you; however, it will probably not be for a fee. Or, if you know of an artist in your area who is an oil painter, they can varnish the painting for you as well.
One final solution is to varnish the oil painting yourself. However, I wouldn’t recommend this if your painting is a valuable piece of art. If you do varnish the painting yourself, be sure to use varnish designed for fine art oil paintings. And make sure to follow all the instructions on the label. It is not recommended that you use varnish obtained from a hardware store, as this kind is too harsh for the painting and could wind up damaging it.
Additional information on how to preserve the beauty of your oil paintings can be found here.
You May Also Like
FROM THE EDITORS: We hope you enjoyed this blog about varnishing oil paintings and found it’s information to be useful. We’re sure you’ll enjoy the oil paintings below too. For more information and details, click or tap the thumbnail link.

9″ w x 12″ h

12″ w x 9″ h

(2020)
24″ w x 18″ h
Art Gallery Quick Links
Flowers | Landscapes | Marine | People
Space Art | Still Life | Wildlife
Additional Reading
Making and Using a Viewfinder to Compose Better Paintings
Using a Grid to Enlarge and Transfer an Image to Canvas
More information about this topic and many others can be found in My Artist Blog Index. Check it out!
Thanks for reading this!
Feel free to share this with your friends.


 Using the viewfinder is a simple technique that has been around and used by artists for centuries. What a viewfinder does is frame in and crop out unimportant areas of an image. The elements inside the frame will make up an attractive focal point that can be used to begin your painting.


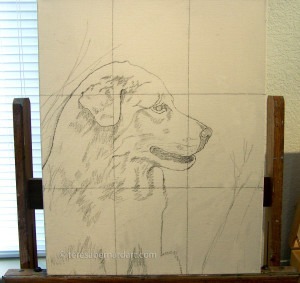
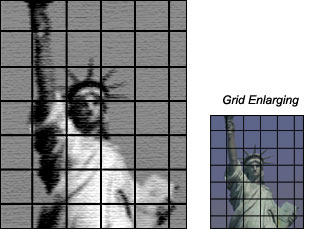 A grid is a series of equally spaced horizontal and vertical lines that intersect to form a boxed pattern. It serves to divide the original image into smaller blocks to see what goes where more easily. Grid enlarging can be a valuable exercise in helping to improve your drawing and observational skills.
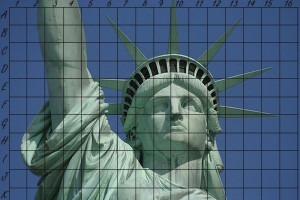 Step 3: Use a pencil and ruler to carefully measure and mark along the outside edge of the photo. Put tick marks at every inch, half-inch, or quarter inch, depending on the size of your reference image and how much detail you need to transfer. Then carefully connect your marks by lightly drawing your grid directly onto the image.
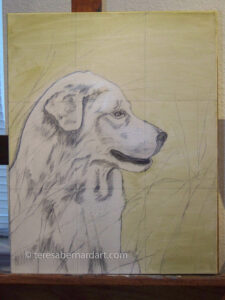
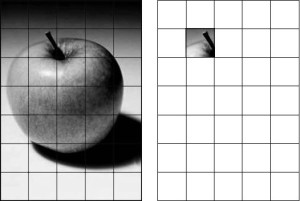 Step 4: Begin your transfer by drawing everything you see in one block of the reference photograph into the corresponding block on your canvas. Concentrate on one square at a time until it is fully completed, then proceed to the next square. Disregard squares you’re not working on until you come to them. The reason you should focus on only one square at a time is so that you will end up drawing what is actually there—what your eye sees—rather than what you think should be there.
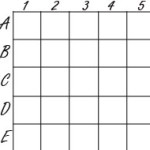 Begin your drawing with the top left square (A1) and proceed across and down the canvas, moving row by row and column by column, until your detailed drawing is complete. Pay careful attention to make sure you are in the correct square, or your drawing will be off, and you will have to erase some of the drawing and start over from the point where you went off-grid.